
In patch 6.1, FFXIV introduced a new feature called portrait. These functions are very similar to the group pose (gpos) function, which allows you to take pictures of characters, but with limited background and action poses.
Portrait is often used as the display image for the explorer panel, which is another feature that was added at the same time. If you want to learn more about setting up one of these for yourself, you can read what you need to know in this article here.
Contents
What is a portrait?
Portraits are photos of characters that you can take in a style similar to Gpos. They can then be displayed on your adventurer board and at the start of Clash of Crystal matches in PvP.
How to view your portrait
Your vertical window can be found in the menu under Character > Portrait.
You can also drag it to the hotbar or set the keybinding for it directly in System > Keybinding > Shortcuts.
You can also use the /portrait command.
How to change your Adventurer Board portrait
You can choose which portraits will show up on the Explorer Panel by right-clicking on the portrait and choosing “Apply to Explorers Panel”. The portrait currently displayed on your explorer panel has a prominent icon to the left of it.
The portrait applied to your adventurer board does not update in real time to reflect your current appearance; it will always show you exactly as you set it. If your portrait shows you holding an ax, it will always show the ax even if you switch to another class, such as white mage or bard.
Show portrait before PvP match
The portrait shown at the start of a Crystal Clash match is called your “instant portrait”. To display correctly, instant portraits must match the device you are wearing.
For example, if you set up a portrait where you’re waving to the camera in a bathing suit, then put on heavy armor into battle, the pre-match screen will show you in your default pose ( close-up) in the armor portrait.
If you use different charms for different jobs, this means you need to save an instant portrait for each job.
To set up an instant portrait, right-click the portrait and select “Use as Instant Portrait”. The portrait that is currently set as your instant portrait will have a different icon to the left or an exclamation point if it doesn’t match the device you’re currently wearing.
You can also associate a portrait with a gear set so that the specified portrait is applied as your instant portrait whenever you switch to that gear set. Keep in mind that if you change your gear for this job in any way, you’ll still need to go in and update your portrait with the new look for the instant portrait to show up in PvP.
This can be tedious, as updating the gear set will immediately unlink the instant portrait and you have to reset it. I know portrait photography is still in beta, so I hope they improve this interaction to be more user-friendly.
create portraits
The small plus icon in the lower left corner of the vertical window allows you to create a new portrait. By default, the name of the portrait is the name of the expression or pose your character is doing in it, but you can change the name to whatever you want.
portrait photo editing
It’s important to know that you can take action against your account if it violates your image. While it can be fun to design a provocative portrait, some players have been seen taking a break from using the tool for things that are on the list of prohibited activities in Final Fantasy XIV. Specifically, people are blamed for obscene/indecent expressions.
Suspensions or other behavior may be the result of other players reporting seeing license plates or images resembling these adventurers and having privacy settings that limit visibility only. for friends or yourself. However, if your Adventurer license plate is visible to everyone (the default), then make sure the image doesn’t go off-limits and come off as rude.
Likewise, any avatar you set as an instant avatar will be visible to everyone in the Crystalline Clash matches you play, so keep an eye out for those.
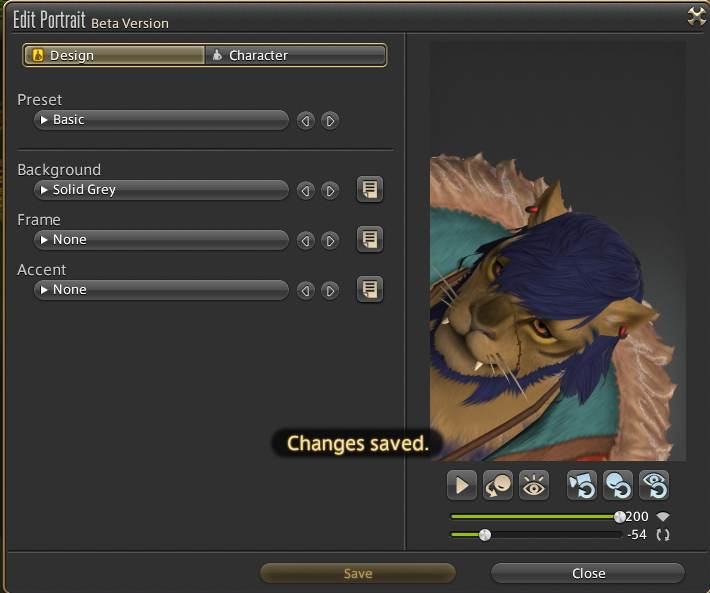
Edit portrait design
Just like the Adventurer license plate, you can choose from a list of available designs to get a quick idea of the types of design options that exist.
Below the presets are individual design elements that you can control. Click the Show List button on the right to preview all the options, including those you haven’t unlocked.

Clicking on one will also tell you how to get it, whether it’s from a vendor, a quest reward, or an achievement.
Character Pose Editing
Your manipulation options are more limited than what you can use in gpos. For example, you cannot use any job-specific skills except for the PvP Limit Break action, which is included in that job’s Framer set and can be purchased with trophy crystals in the Wolf’s Den.
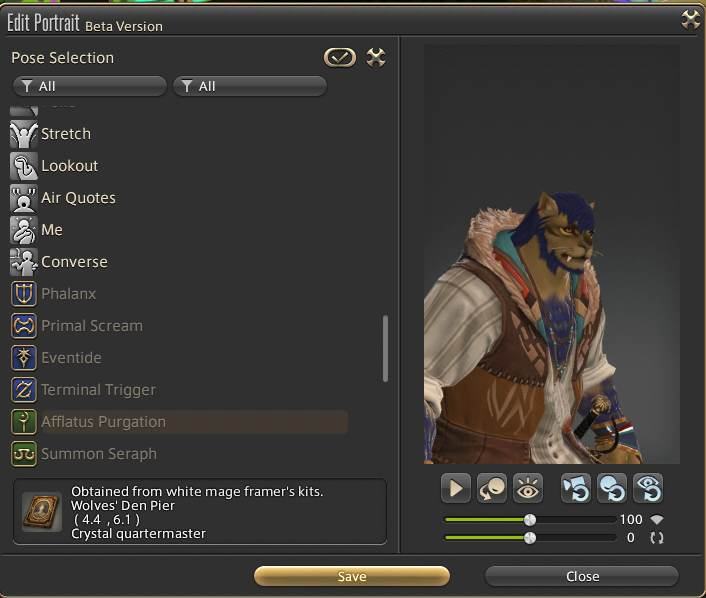
There is also a drop-down list of expressions from which you can select, mix and match them with poses.
Similar to the character window or the locker room window, you can hold left click to rotate the camera around your character or right click to drag your character around the frame.
This feature gives you fine control over your character’s position by allowing you to adjust the head angle and perspective using the buttons below the portrait. Those are “Face Camera” and “Looking at Camera”.
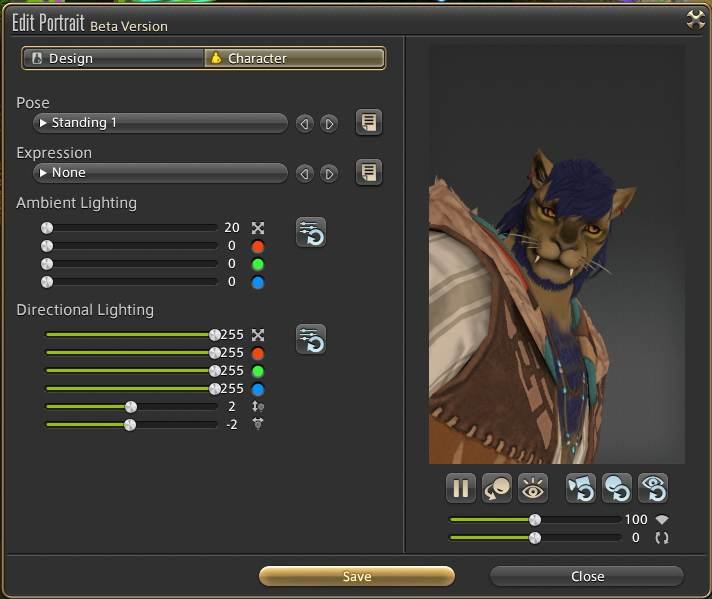
There are also lighting controls that let you change the ambient light and direction. For directional lighting, there are two sliders. At 0.0, the light will focus in front of the character.
Moving the first slider upwards will cause the light to rotate above your character and behind them. Moving the first slider downwards will cause the light to rotate down to the character’s feet and behind them.
Moving the second slider up will rotate the light to the left and behind the character. Moving the second slider down rotates the light to the right and behind the character.
This means +/-180 looks the same (the light is behind you) and if you want the camera to be right above/below/left/right, you’re looking at the midpoint of +/-90 on the slider fit.
Turning off the ambient light makes the directional light clearer. For example, here’s a blue/green light at 0.90 scale (lighting the character from his left side), with ambient light all the way down.

Below the portrait are zoom and pan sliders that you can also use, but keep in mind that your character’s face must be visible to save the portrait. An error will appear when trying to save a portrait, letting you know that the character’s expression is out of frame.
Finally, while the portrait will be a still image of your character, the special weapon effects will be animated. If you want to add a touch of sophistication to your portrait, you can use relic weapons, ultimate weapons, or extreme weapons crafted to add shine and sparkle.
What’s your favorite part of the portrait feature? If you find any tips and tricks for cool effects, be sure to share them below!